how to build a custom PC step by step: Your Ultimate Guide
June 27, 2026 16 min read 3,157 words
Unlock unparalleled performance, customization, and savings by assembling your dream machine from the ground up.
Start Building Today
Understanding Core PC Components and Compatibility
 Photo: Andrey Matveev / Pexels
Embarking on the journey of how to build a custom PC step by step begins with a profound understanding of its core components and, crucially, their compatibility. This foundational knowledge isn't just about listing parts; it's about grasping how each piece interacts with the others to form a cohesive, high-performing system tailored to your specific needs. The central processing unit (CPU) acts as the 'brain' of your computer, executing instructions and processing data. Manufacturers like Intel and AMD offer various CPU lines, each with different socket types (e.g., LGA 1700 for Intel, AM5 for AMD). This socket type dictates which motherboards are compatible. For instance, an Intel CPU requires an Intel-compatible motherboard chipset. The graphics processing unit (GPU), often called the graphics card, is vital for anything visually intensive, from gaming to video editing. While some CPUs have integrated graphics, a dedicated GPU is essential for serious performance. GPUs come with their own set of considerations, including physical size (will it fit in your case?), power consumption (does your power supply have enough wattage and the correct connectors?), and PCIe slot compatibility (most modern GPUs use PCIe 4.0 or 5.0 x16 slots).
Random Access Memory (RAM) is your system's short-term memory, allowing fast access to data currently in use. The two main types are DDR4 and DDR5, which are not cross-compatible. Your chosen motherboard will specify which RAM type it supports, along with the maximum capacity and speed (MHz). Higher speeds can offer marginal performance gains, especially in CPU-intensive tasks. Storage comes in two primary forms: Hard Disk Drives (HDDs) for mass storage at a lower cost, and Solid State Drives (SSDs) for faster boot times and application loading. NVMe SSDs, which connect directly to the motherboard via an M.2 slot, offer the fastest speeds, significantly outperforming SATA SSDs and HDDs. Your motherboard will have a certain number of M.2 slots and SATA ports, so plan your storage configuration accordingly.
The motherboard is the central hub, connecting all components and allowing them to communicate. Beyond CPU socket and RAM type, consider its form factor (ATX, Micro-ATX, Mini-ITX – which dictates case compatibility), the number of PCIe slots, M.2 slots, SATA ports, USB ports, and Wi-Fi/Bluetooth capabilities. The power supply unit (PSU) converts AC power from your wall outlet into DC power for your components. Its wattage must be sufficient to power all your components, with some headroom for future upgrades. PSU efficiency ratings (e.g., 80 Plus Bronze, Gold, Platinum) indicate how much power is lost as heat; higher ratings mean less waste and lower electricity bills. Finally, the PC case houses all these components. Its size (full-tower, mid-tower, mini-ITX) must accommodate your motherboard, GPU, and cooling solutions. Good airflow and cable management features are crucial for system longevity and aesthetics. Understanding these interdependencies is the first, most critical step in successfully building your own PC. For a deeper dive into component selection, check out our guide on
choosing the right PC parts. It will guide you through the nuances of each component.
The Assembly Process: A Step-by-Step Walkthrough
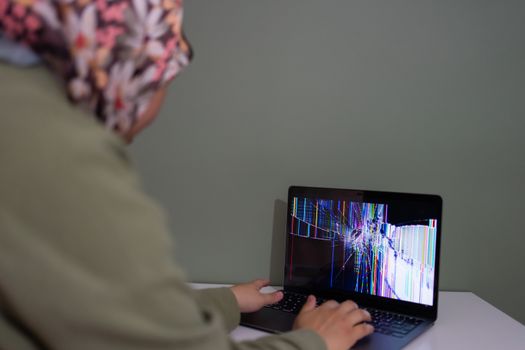 Photo: Beyzanur K. / Pexels
Once you have all your meticulously chosen components, the real fun begins: the assembly. This section guides you through how to build a custom PC step by step, ensuring a smooth and successful process. Before touching any components, prepare your workspace. Find a clean, well-lit area with plenty of room. Lay down a non-conductive surface, like a wooden table, and consider wearing an anti-static wrist strap connected to a grounded metal object (like your PC case's unpainted metal) to prevent electrostatic discharge (ESD), which can damage sensitive electronics.
**Step 1: Preparing the Motherboard.** Start by installing the CPU. Open the CPU socket lever on your motherboard, carefully align the CPU with the triangular or arrow marker on both the CPU and the socket, and gently place it in. Do not force it. Once seated, close the lever to secure it. Next, install your RAM modules. Locate the RAM slots, open the clips on both ends, align the RAM stick's notch with the slot's key, and push down firmly until the clips snap into place. If you have two sticks, install them into the corresponding dual-channel slots (check your motherboard manual for correct slots, usually alternating). Finally, install your CPU cooler. If it's an air cooler, apply thermal paste (if not pre-applied) and mount it according to its instructions. For an AIO liquid cooler, install the CPU block now, leaving the radiator and fans for later.
**Step 2: Mounting the Motherboard and PSU.** Carefully take your PC case and install the I/O shield (the metal plate for your motherboard's ports) into the designated opening at the back, if it didn't come pre-attached to your motherboard. Then, install the motherboard standoffs into the case; these are small screws that elevate the motherboard to prevent it from shorting against the case. Gently place your assembled motherboard into the case, aligning the screw holes with the standoffs, and secure it with screws. Next, install the power supply unit (PSU). Most cases have a dedicated bay for the PSU at the bottom or top. Slide the PSU into place and secure it with screws from the outside of the case. Ensure its fan is facing the correct direction for optimal airflow (usually downwards if there's a filtered vent).
**Step 3: Installing the GPU and Storage.** Now it's time for the graphics card. Locate the primary PCIe x16 slot on your motherboard (usually the top-most reinforced slot). Remove the corresponding PCIe slot covers from the back of your case. Open the retention clip at the end of the PCIe slot. Align your GPU with the slot and push down firmly until it clicks into place and the retention clip closes. Secure the GPU to the case with screws. For storage, install your NVMe SSDs into the M.2 slots on your motherboard, securing them with the small screw or latch provided. For SATA SSDs or HDDs, mount them into the drive bays in your case and connect a SATA data cable from the drive to a SATA port on your motherboard, and a SATA power cable from your PSU to the drive.
**Step 4: Cable Management and First Boot.** This is where the magic happens and where patience pays off. Connect all necessary power cables from your PSU to your components: the 24-pin ATX power to the motherboard, the 8-pin (or 4+4 pin) CPU power to the motherboard, PCIe power cables to your GPU, and SATA power to your drives. Connect your case's front panel connectors (power switch, reset switch, USB ports, audio jacks, LED indicators) to the tiny pins on your motherboard – consult your motherboard manual carefully for their correct placement. This step is often the most fiddly. Once all cables are connected, try to route them neatly behind the motherboard tray for better airflow and aesthetics.
Before closing the case, connect a monitor, keyboard, and mouse. Power on your system. If all goes well, you should see your motherboard's BIOS/UEFI screen or a prompt to install an operating system. This initial boot check confirms your components are correctly installed and communicating. If it doesn't boot, troubleshoot common issues like loose cables or incorrectly seated RAM. After a successful POST (Power-On Self-Test), install your operating system, update drivers, and enjoy your custom-built PC!
Software Installation and Optimization for Peak Performance
Having successfully navigated how to build a custom PC step by step and achieved that glorious first boot, the journey isn't over. The hardware is the foundation, but software is what brings your machine to life and unlocks its full potential. The first critical step after assembly is installing your operating system (OS). For most users, this will be Windows 10 or Windows 11. You'll need a USB flash drive with the OS installation media, which you can create using Microsoft's Media Creation Tool on another computer. Boot from the USB drive, follow the on-screen prompts to select your primary storage drive, and let the installer do its work. Once the OS is installed, you'll likely notice some components aren't working at their best, or perhaps some devices aren't even recognized. This is where drivers come in. Drivers are software programs that allow your operating system to communicate with your hardware.
The most important drivers to install immediately are for your motherboard's chipset, your graphics card (GPU), and your network adapter (Ethernet and/or Wi-Fi). You can usually find these on the manufacturer's websites. For your motherboard, visit the support page for your specific model and download the latest chipset drivers, audio drivers, and any other relevant utility drivers. For your GPU, go to NVIDIA's or AMD's website and download the latest drivers for your specific card. Installing these drivers will significantly improve performance, stability, and unlock features. For instance, without proper GPU drivers, your display might be stuck at a low resolution, and games will be unplayable.
Beyond basic drivers, consider installing other essential software. A good antivirus program is paramount for security. Web browsers like Chrome, Firefox, or Edge are necessary for internet access. Productivity suites such as Microsoft Office or free alternatives like LibreOffice are often needed. For gamers, platforms like Steam, Epic Games Store, or GOG are essential. Once the core software is in place, it's time for optimization. Keeping your system updated is crucial. Regularly check for Windows updates, GPU driver updates, and motherboard BIOS updates. BIOS updates, while less frequent, can improve compatibility, stability, and sometimes performance. However, BIOS updates carry a small risk, so only perform them if necessary and follow the manufacturer's instructions precisely.
Furthermore, optimizing your system involves managing startup programs to reduce boot times, uninstalling bloatware, and regularly defragmenting HDDs (though not necessary for SSDs). For performance, delve into your graphics card control panel (NVIDIA Control Panel or AMD Adrenalin Software) to fine-tune settings for your games or applications. In the BIOS/UEFI, you might enable XMP (Extreme Memory Profile) or DOCP (Direct Overclock Profile) to ensure your RAM runs at its advertised speed, as it often defaults to a lower speed. Overclocking your CPU or GPU can yield performance gains, but this is an advanced topic that requires careful research and understanding of potential risks, including increased heat and system instability. For a comprehensive guide on software installation and best practices, consult our article on
optimizing your PC for gaming and productivity. This will ensure your custom build performs at its peak.
Common Pitfalls and Troubleshooting Tips for DIY PC Builders
Even with a detailed guide on how to build a custom PC step by step, new builders often encounter common pitfalls. Being aware of these can save you hours of frustration. One of the most frequent issues is static electricity. Always ground yourself with an anti-static wrist strap or by frequently touching an unpainted metal part of your case. Another common mistake is forcing components. If a part doesn't fit easily, double-check its orientation and compatibility. Forcing a CPU into its socket or RAM into its slot can bend pins or damage the component, leading to costly replacements. Incorrect cable connections are also a major source of headaches, especially the tiny front panel connectors. Refer to your motherboard manual religiously for these. Misconnecting them can result in power buttons not working, USB ports being inactive, or audio jacks failing.
Upon your first boot, if nothing appears on screen, or you get error codes, don't panic. This is where troubleshooting comes in. Start with the basics: ensure your monitor is plugged into the dedicated GPU (not the motherboard's integrated graphics ports, unless you don't have a dedicated GPU). Check all power connections – the 24-pin ATX, 8-pin CPU, and GPU power cables. Reseat your RAM sticks; sometimes they just need a firm push to make proper contact. If your motherboard has diagnostic LEDs or a small speaker, consult your manual to interpret the codes or beeps, as they often point directly to the problematic component (e.g., a specific number of beeps for RAM issues).
Another pitfall is inadequate cooling. Ensure all fans are spinning and oriented correctly for optimal airflow (intake at front/bottom, exhaust at rear/top). Poor thermal paste application or an improperly seated CPU cooler can lead to immediate overheating and system shutdowns. If your system boots but then crashes under load, thermal issues are a prime suspect. Finally, don't overlook driver issues. A fresh OS installation might run fine, but without proper GPU drivers, for example, games will perform poorly or not at all. Always download the latest drivers directly from the component manufacturers' websites. Persistence and systematic troubleshooting are key to overcoming these challenges and enjoying your custom-built machine.
**Troubleshooting Checklist:**
* **No Display:** Check monitor connection to GPU, power to GPU, RAM seating.
* **No Power:** Verify PSU connections (24-pin, CPU), front panel connectors.
* **Error Beeps/LEDs:** Consult motherboard manual for diagnostic codes.
* **System Crashes/Overheating:** Check CPU cooler seating, thermal paste, fan orientation, case airflow.
* **Poor Performance:** Install/update GPU drivers, chipset drivers, enable XMP/DOCP in BIOS.
* **Component Not Recognized:** Check power and data cables, reseat component, update drivers.
Remember, every PC builder, from novice to expert, encounters issues. The ability to systematically troubleshoot is as important as the ability to assemble the parts. Take a deep breath, consult your manuals, and tackle one potential problem at a time. The satisfaction of resolving an issue and seeing your custom PC run perfectly is immensely rewarding.